| A1 Electric Automotive Accessories |
| Installing Power Windows in a Dodge Caravan |
| HOME | ELECTRIC LIFE POWER WINDOWS | INSTALLATION ARTICLES | KEYLESS ENTRY & ALARM SYSTEMS |
| OE Replacement Motors | Switch Kits | Power Door Locks | Spal Accessories | Pop Doors | Colibri | Classic Car Windows |
| ONLINE CATALOG & APPLICATION GUIDE |
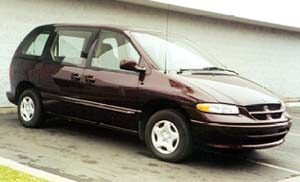
| The Dodge Caravan is one of the top selling minivans in the country. There are thousands on the road that came without power windows. For those vans, we have the perfect solution. |
|---|

|
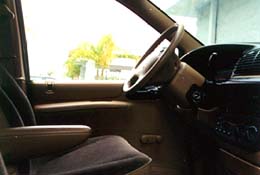
The Electric Life power window for the Dodge Caravan is a "bolt in" kit. It completely replaces the manual mechanism. Most shadetree mechanics can successfully install this kit. |
| The professional installers at A-1 Electric will guide us through the Caravan power window installation. The first step in installing a window kit is to read through the instructions and verify the contents of the kit. | 
|

|
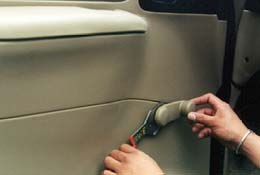
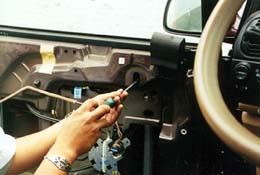
Our installer starts by removing the screws that secure the panel. To remove the crank handle you must remove the clip from it's slot. A clip removal tool works best, but a small screwdriver or hook can also be used. |
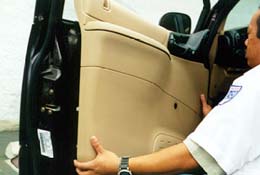
| The plastic clips that retain the door panel must be gently pryed up and off the door. Our favorite tool for this is a stiff scraper with a bent blade and a notch cut into the end. | 
|

|
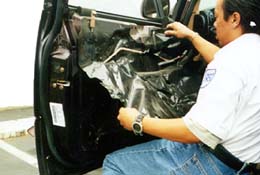
The inner liner is carefully peeled off the door and saved for latter. It is very important to reinstall the liner upon completion. It helps keep moisture, wind and noise out of the car. |
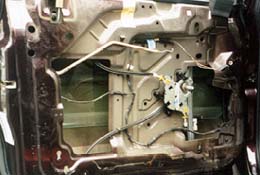
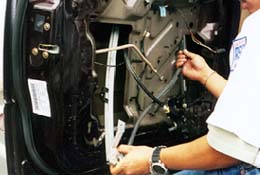
| This is what the original Caravan regulator looks like. It uses a Bowden cable style regulator. The Electric Life regulator that will replace it is also a Bowden cable style regulator. | 
|

|
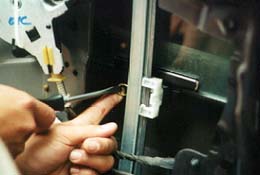
The glass is held onto the regulator with 2 clips. The window is moved down so we can reach the clips. After removing the clips, the glass is seperated from the regulator. |
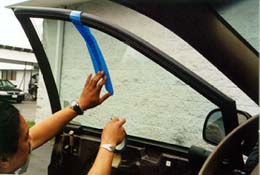
| The glass is raised and secured into the top of the door. Our installer used masking tape to hold up the window. Care must be taken not to mar the paint. | 
|

|
The three Torx head screws that hold on the crank mechanism are then removed. The rubber bushings they screw into may have to be held from inside the door with a pair of pliers. |
| The Torx screws that hold the tracks onto the door are removed next. There is an upper and lower screw attaching each track to the door. | 
|

|
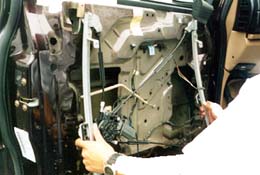
Once the hardware is removed (7 screws, 2 clips), the regulator can be removed from the door. It usually takes several tries to wiggle the tracks out of the small access holes that Chrysler left us. |
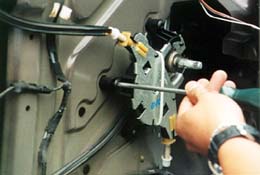
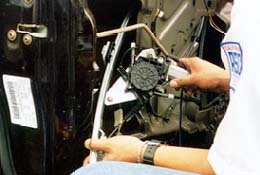
| Our installer is holding the Electric-Life mechanism up against the door. Notice how closely it resembles the factory regulator. Before installing the new regulator, our installer checks out how the regulator will be positioned in the door. | 
|

|
The new regulator is fitted into the door, one track at a time. This step will take a little patience. Fitting the regulator into the doors small access holes can be tricky. |
| This concludes part 1 of our Caravan installation.
See part 2 for the completion. PART 2 |
Ready to Order?
Need Prices?
Use our Online Catalog & Application Guide!
![]()
We have thousands of items in stock and ready
to ship!
A1 Electric Automotive Accessories
Local (310) 328-8500 Toll Free (888) 838-0506
Contact A1 Electric by Email
Ready to checkout?

SHOPPING CART
Home |
Company Information |
Ordering Information |
FAQ's
Electric Life Power Windows |
Installation Articles |
MES Power Door Locks
Alarms & Keyless Entry |
Power Window Switches |
OE Window Lift Motors |
Colibri Power Windows
Accessories & Pop Door Kits |
Street Rod Window Kits |
SPAL |
Classic Car Windows |
Speedometer |
Links to other Sites
Tech Articles & Information
Mustang |
Chevelle |
Dodge Ram PU |
Door Lock Installs |
S10 Window Motor |
Maxima |
Grand Am |
Silverado Windows
Cable Locks |
Tacoma |
Tacoma Tech |
Ford F150 |
55 Chevy |
Volvo |
Chevy PU |
Camaro |
VW Golf |
Chevy PU
Chevy Astro |
Caravan |
VW Beetle |
Colibri-Astro |
Mopar |
Focus |
Silverado Door Locks