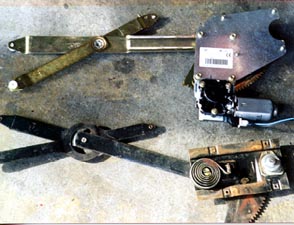
This shot shows a comparison between the Electric-Life and the original regulator. Notice how the Electric-Life regulator is a scissors type, just like the factory piece. It should also be noted that Electric-Life kits are manufactured in Italy and comply with the new ISO 9002 specifications for quality. If you want the best, you want Electric-Life.
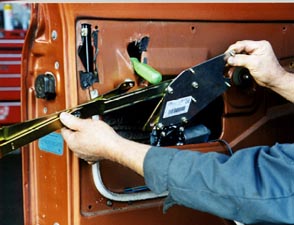
After attaching the motor wires, slide the Electric-Life regulator back into the door. Line up the slides with the tracks on the glass and the door and slide them in. Be patient. This may take a little time and finese to get all three lined up at the same time. It may also help to have an assistant hold the window against the rear channel and move the glass up and down slightly to aid in lining up the slides. When all 3 slides are in their respective tracks, move the window either up or down until the studs on the regulator match the holes in the door.
Attach the regulator using the hardware supplied. The kit uses Metric hardware, so the old hardware must not be reused. Use a 10mm wrench to tighten the mounting nuts. Apply power and ground to the blue and black wires coming from the motor and roll the window down. Reversing the wires will make the window travel in the opposite direction. Run the window down into the door. Place the wing window assembly back in the door and reattach the screws.

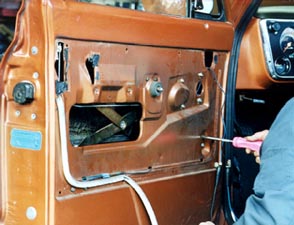
At this stage the power window wiring must be run into the truck. Holes must be drilled in the doorjamb and grommets installed in the holes to pass the wires through. Be sure to avoid any sharp metal edges which might short the wires. After the wires have been routed through the truck, connecting them to power and ground is all that is left.
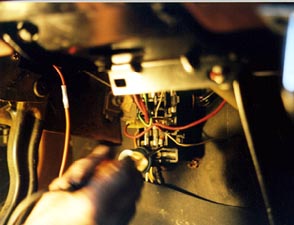
Tap into a heavy circuit that is live only with the key on. We choose to tap into a power wire close to the fusebox. After the wiring is done the switches need to be mounted in the door panels. We used the illuminated switch kit in this vehicle so that the bezels would cover up the bump where the crank handles were. The holes are slightly enlarged using the new bezel as a pattern, and the panels are screwed in from behind. When the car goes to the paint shop, the door panels and the switch bezels will get painted.
After reassembling the door panels, the system is ready to test. The Electric-Life power window kit works perfectly. The window works quietly and quickly, just like it should.
